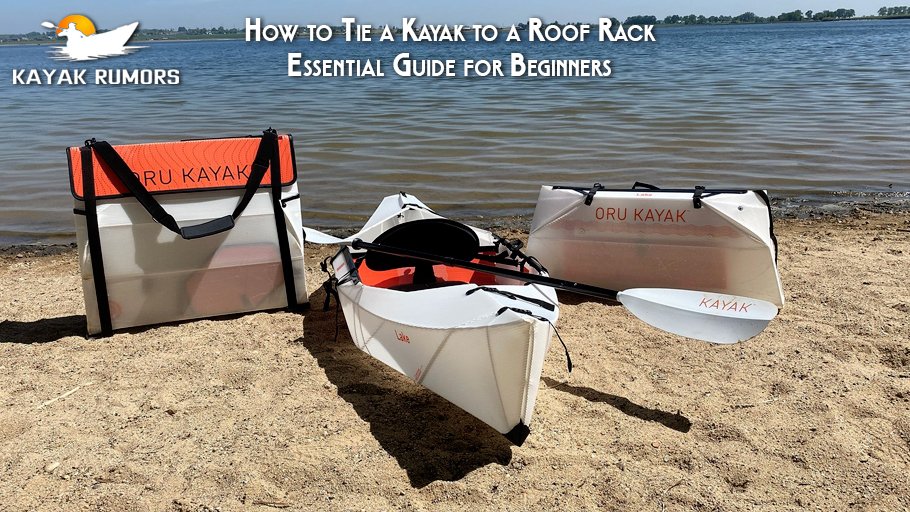
How to tie a kayak to a roof rack is something every paddler should know before hitting the road. It’s not just about getting your kayak from point A to point B — it’s about doing it safely, without damaging your car, your kayak, or causing issues on the road. If you’ve never done this before, don’t worry. It’s easier than it looks when you know the steps.
At Kayak Rumors, we know that a lot of first-time paddlers struggle with kayak transport. You might be worried about the straps, if your kayak is secure enough, or if you’re using the right gear. That’s why we’ve created this simple, beginner-friendly guide to help you feel confident every time you load up.
What You’ll Need Before You Start
Before we get into the steps, make sure you have these items ready:
- A roof rack – Factory-installed or aftermarket crossbars will work
- Two cam buckle tie-down straps – Usually 10–15 feet long
- Bow and stern lines – For the front and back of the kayak
- Optional: Kayak pads, foam blocks, or towels (to protect your car and kayak)
Avoid using ratchet straps unless you’re very experienced — they can be too tight and damage the kayak.
Step-by-Step: How to Tie Down Your Kayak to a Roof Rack
Step 1: Center the Kayak on the Roof Rack
Lift your kayak and place it evenly on your roof rack. Most racks will have two crossbars — set the kayak so it’s centered between them and lies flat. If you’re loading alone, lift one end at a time and use a towel to protect your car’s roof if needed.
Tip: The cockpit should be facing down (or on its side, if using J-cradles).
Step 2: Loop the Straps Over the Kayak
Take your first strap and toss it over the top of the kayak. Do the same with the second strap. Make sure the buckles are on the side of the kayak, near the base of the roof rack where you can reach them.
Step 3: Run the Straps Under the Crossbars
Go around each crossbar and bring the strap back up to the buckle. Pull it tight so the kayak presses firmly against the rack, but don’t overtighten. Repeat this for the second strap.
Tip: Pull the strap straight down, not sideways — this helps apply pressure evenly.
Step 4: Secure the Buckles and Tie Off the Ends
Once tight, secure the strap by tying off any loose ends. This prevents the straps from flapping in the wind or coming loose on the road.
Note: Always tie off the ends — loose straps can scratch your car or cause noise.
Step 5: Attach Bow and Stern Lines
Now use separate ropes or straps to secure the front (bow) and back (stern) of the kayak. Connect each end to a secure point on your car — like tow hooks, under the bumper, or using hood/trunk loop anchors. This adds extra security during stops, turns, or in strong winds.
Final Check Before Driving
After everything is tied down:
- Gently shake the kayak — it shouldn’t move side to side or up and down.
- Check that the straps are not cutting into the kayak
- Make sure the buckles are secure and the straps aren’t twisted
Drive slowly for the first few miles and listen for any odd noises. It’s smart to stop and recheck the straps after 15–20 minutes on the road — they sometimes loosen as things settle.
Real Advice from Kayak Owners
Many beginners think “tight” means “as tight as possible,” but too much pressure can crack a plastic hull. You want the kayak snug, not squished. Some users wrap a towel under the buckle to avoid pressure marks. Others label their front and back straps for quicker loading next time.
Common Mistakes to Avoid
- Don’t use bungee cords — they stretch and don’t hold the kayak securely
- Don’t rely on just one strap — always use two across the kayak
- Don’t forget the bow and stern lines — they help in emergencies or sudden stops
- Don’t tie straps across the top only — they must go under the crossbars to stay secure
That’s the full basic process for how to tie a kayak to a roof rack. Once you’ve done it a few times, it becomes second nature. And remember, your goal is to make sure the kayak stays tight during the ride — not just at the start.
Choosing the Right Gear and Accessories
When learning how to tie a kayak to a roof rack, the first step is getting the right gear. Even if your tying technique is perfect, poor-quality or mismatched equipment can still lead to a loose kayak, scratches on your car, or worse — a kayak flying off mid-drive.
This section covers everything you need to know about racks, straps, and accessories that make your transport safer and smoother.
Understanding Roof Rack Options
Not all roof racks are the same. The type of rack you have (or need) depends on your car and how often you’ll be transporting a kayak.
Here are the most common roof rack types:
1. Factory Roof Racks
- Installed by your car manufacturer
- Usually have side rails and sometimes crossbars
- Great for casual paddlers or short trips
- Check that the crossbars are strong enough to hold the weight of your kayak
2. Aftermarket Roof Racks
- Brands like Thule, Yakima, and Rhino-Rack
- More durable and customizable
- Ideal for regular use or long-distance travel
- Can be installed even if your car doesn’t have rails
3. Foam Blocks or Temporary Pads
- Budget-friendly and good for one-off trips
- Sit on your car roof without permanent racks
- Must be used with straps running through your car doors
- Not ideal for highway driving or heavy kayaks
Tip: If you plan to kayak regularly, invest in a solid roof rack system. It makes everything easier and safer.
Choosing the Right Straps
Straps are just as important as the rack. They hold your kayak in place and prevent shifting while you drive. Here’s what to look for:
Cam Buckle Straps
- Recommended for tying down kayaks
- Easy to tighten by hand
- Won’t over-compress the kayak
- Usually made of heavy-duty nylon with metal buckles
Stick to two straps, each 10–15 feet long, depending on your kayak’s width and height.
Avoid Ratchet Straps
- Too much pressure can crack your kayak
- Meant for heavy loads, not kayak transport
- Easy to overtighten if you’re not careful
Bow and Stern Tie-Downs
Some paddlers skip bow and stern lines — but they shouldn’t.
These lines connect the front and rear of your kayak to the car, reducing movement caused by wind or sudden stops. They’re simple to install and add a big safety boost.
What You Can Use:
- Nylon ropes
- Special kayak tie-downs with hooks
- Straps with carabiners
Where to Attach:
- Use tow hooks, frame points, or hood/trunk loops
- Never attach to plastic bumpers or loose parts
Tip: You can buy hood/trunk loop anchors if your car doesn’t have obvious tie-down points.
Helpful Accessories Worth Having
These extras aren’t always required, but they make your job easier and protect your gear:
1. Kayak Pads or Foam Covers
- Wrap around your crossbars to protect the kayak
- Also, prevent scratches on the kayak’s bottom
- Some racks come with built-in padding
2. Towels or Blankets
- Simple way to protect your car roof or kayak during loading
- Great for quick DIY setups
3. Load Assist Tools
- Rollers, side-loaders, or load bars
- Useful if you’re transporting the kayak solo
- Help guide the kayak onto the roof without lifting the full weight
4. Red Safety Flag
- Needed if your kayak extends beyond the back of your car
- Required by law in some places for long loads
Comparing Budget vs Premium Gear
| Feature | Budget Option | Premium Option |
|---|---|---|
| Price | Lower upfront cost | More expensive |
| Durability | May wear faster | Built to last |
| Ease of Use | Manual setup | Quick and secure systems |
| Best For | Occasional users | Frequent kayakers, road trips |
If you’re only going kayaking a few times a year, budget options might be fine. But if this is your go-to weekend activity, premium gear pays off quickly — in convenience and peace of mind.
Recap: What to Look for in Good Kayak Transport Gear
- A secure, weight-rated roof rack
- Two cam buckle straps, not ratchets
- Bow and stern lines for extra stability
- Optional pads or blocks to prevent damage
- Tools that help you load more easily, especially if solo
Choosing the right gear is half the battle. Once you have solid equipment, the actual tying process becomes faster, safer, and way less stressful.
Techniques for Loading a Kayak Onto a Roof Rack by Yourself or with Help
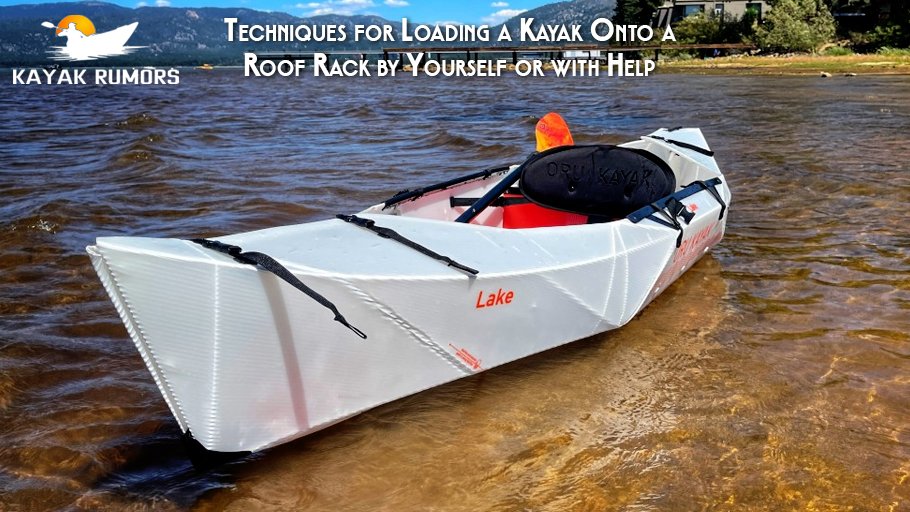
Getting your kayak on top of your car can feel like the hardest part of any trip — especially if you’re doing it alone. The good news? With the right technique (and a few smart tools), loading your kayak doesn’t have to be a struggle.
Whether you’re loading solo or with someone else, this section will show you easy and safe ways to lift and position your kayak without damaging your gear, your car, or your back.
Loading a Kayak By Yourself (Solo Loading Tips)
If you’re paddling solo, you’ll need a method that keeps things safe and manageable. Here are a few reliable ways to do it:
Rear Loading (Most Common for One Person)
This is one of the easiest ways to load a kayak alone, especially if your vehicle is an SUV or has a high roof.
Steps:
- Place a towel, mat, or small roller on the back edge of your car.
- Lift the front end of the kayak and set it on the back of your vehicle or rack.
- Move to the back, lift the other end, and slide the kayak forward onto the roof rack.
- Adjust the kayak until it’s centered and stable.
Tip: Keep the heavier end of the kayak (usually the stern) at the bottom while lifting.
Side Loading
If your car is lower or you’re using foam blocks, you can lift the kayak from the side and place it directly onto the rack.
Steps:
- Lift one end of the kayak and rest it on the side rail or block.
- Carefully lift the other end and rotate the kayak into position.
- Slide it to the center on the roof rack.
This method works well with smaller or lighter kayaks.
Helpful Tools for Solo Loading
Solo doesn’t have to mean struggle. These tools are designed to help you load a kayak without straining:
1. Load Assist Bars
- Extend out from your roof rack and support one end of the kayak
- Let you rest one side while lifting the other
- Useful for SUVs and taller vehicles
2. Roller Systems
- Rollers attach to the rear crossbar or back window
- Help you slide the kayak up instead of lifting the full weight
3. Lift-Assist Racks (Gas-Assisted or Mechanical)
- These systems lower the rack to your level
- You load the kayak at waist height, and the rack lifts it back up
- Best for frequent paddlers or those with physical limitations
Tip: Always test the tool a few times at home before heading out.
Two-Person Loading (Simple and Safe)
If someone is helping you, loading gets much easier — but it still helps to know the best way to do it.
Front and Back Carry
- Each person stands at one end of the kayak.
- Lift together in one smooth motion.
- Walk to the car and gently place the kayak on the roof rack.
- Adjust until it’s centered over both crossbars.
This method avoids twisting or tipping the kayak during the lift.
Side Carry (Short Distance)
- Stand on the same side of the kayak with one person at the bow and the other at the stern.
- Lift the kayak onto the rack from the side, then slide it into place.
- Works well with smaller or lighter kayaks.
Preventing Damage During Loading
Here are some tips to keep your gear and your car safe every time you load:
- Use padding where the kayak contacts the roof
- Avoid dragging the kayak over paint or windows
- Clear the area of dirt or debris that could scratch your vehicle
- Take your time — rushing usually causes mistakes
Helpful Add-On: A folding step stool or small ladder can help if your car is tall.
Different Kayak Types = Slightly Different Handling
Not every kayak handles the same. Here’s what to know:
Sit-on-Top Kayaks
- Usually, it is more stable and easier to grip
- Heavier but less fragile
Sit-In Kayaks
- Lighter but more delicate (cockpit edges can crack)
- Avoid lifting from the rim
Inflatable Kayaks
- Deflate and transport in a bag (no roof rack needed)
- Can be stored in the trunk and inflated with water
Tandem Kayaks
- Longer and heavier
- Always easier to load with two people
Real Experience Tip
Some paddlers mark their roof rack with tape so they always know where to center their kayak. Others label their straps (“front” and “back”) so they don’t waste time figuring it out. These small habits make a big difference when you’re loading alone.
Loading doesn’t have to be hard. With some practice and the right tools, you’ll find a method that works best for your routine, your car, and your kayak.
Travel Safety, Legal Considerations, and Road Prep
Once your kayak is tied down and loaded correctly, the next step is making sure you’re ready to drive safely. Whether you’re going a few miles to the lake or driving hours for a weekend trip, how your kayak is secured — and how you prepare — makes a big difference on the road.
In this section, we’ll go over what you need to check before driving, important laws about kayak transport, and how to avoid common travel mistakes.
Check Before You Drive
Before starting your trip, take a few minutes to inspect everything:
Final Safety Checklist:
- Kayak is centered and stable on the roof
- Straps are tight, with no twisting
- Cam buckles are secure and not digging into the kayak
- Bow and stern lines are attached (front and back)
- Loose strap ends are tied off and not flapping
- No movement when you gently shake the kayak
You can also drive slowly through your neighborhood for a few minutes and stop to recheck — sometimes straps settle or loosen a bit after the first few bumps.
Pro Tip: Listen while you drive. If you hear loud flapping, whistling, or knocking, pull over and double-check the straps.
Driving With a Kayak on Your Roof
Driving with a kayak is a little different from regular driving — but not hard. You just need to adjust for the extra height, weight, and wind resistance.
Road Safety Tips:
- Drive slower, especially on bumpy roads or in strong winds
- Take wider turns to avoid scraping curbs
- Watch for height clearance signs at garages, drive-thrus, or parking decks
- Avoid sudden stops — the kayak may shift or stress the straps
- Take breaks on long drives and check your setup
Strap vibration is a common issue on the highway. If it happens, adding a twist to the strap (just one) can reduce the humming sound caused by airflow.
Overhang Rules and Legal Guidelines
Your kayak may be longer than your car, and that matters legally. Different places have rules about how much a load can stick out from your vehicle.
General Guidelines (May Vary by Region):
- Kayaks can usually extend 3–4 feet behind your vehicle
- A red flag is required on the end of the kayak if it sticks out past a certain point (usually 3+ feet)
- Front overhang is less common, but still needs to be safe and visible
- Some areas also require lights or reflective tape if driving at night
Reminder: Check your local transport laws if you’re crossing state lines or traveling internationally. Some parks or highways also have their own rules.
Using Bow and Stern Tie-Downs Properly
Many paddlers skip the bow and stern lines — but they’re more than just extra straps.
They add stability during braking, high winds, and sudden swerves. They also help in case the roof rack fails (rare, but possible).
Attach these lines:
- From the front of your kayak to a secure front point on your car (like a tow hook or hood loop)
- From the back of your kayak to a rear frame point or trunk loop
Avoid attaching to bumpers, license plate frames, or anything plastic. Use soft hooks or hood loops if your car doesn’t have built-in anchor points.
What to Do If Something Goes Wrong
Even with good prep, things can go wrong. Here’s how to react calmly:
If the kayak starts to shift:
- Slow down and find a safe place to stop
- Tighten straps and check for damage
- Don’t keep driving if the kayak feels loose
If a strap breaks:
- Always carry a backup strap in your car
- Replace the broken one immediately
- Avoid using rope or bungees unless it’s an emergency
If strong wind pushes the kayak:
- Reduce speed
- Stop and add extra lines if needed
- Avoid highways during storms or high wind alerts
Planning for Long Trips
If you’re going on a road trip with your kayak, keep these extra tips in mind:
- Recheck straps at every gas stop
- Carry extra tie-downs in case one breaks or wears out
- Check the weather ahead — heavy wind can make driving tricky
- Bring a kayak cover to protect from bugs, dirt, and sun if driving long hours
Also, avoid driving with a kayak on your roof for days at a time without removing it. The weight can put stress on your rack, especially in hot weather.
Summary: Travel Safe, Paddle Happy
Here’s a quick recap of smart travel prep:
- Check straps and lines before every drive
- Follow legal guidelines for overhang and flags
- Adjust your driving for wind and height
- Recheck everything on long trips
- Keep an emergency strap in your car
Knowing how to tie a kayak to a roof rack is one part, but making sure it stays tied and safe on the road is just as important.
Storage, Maintenance, and Long-Term Transport Tips
Learning how to tie a kayak to a roof rack is just the start. Once you’re done paddling, it’s important to take care of your gear so it stays in good shape and lasts longer — especially if you’re transporting your kayak often or leaving it on your car between trips.
This section covers what to do after driving, how to store your kayak safely, and tips for keeping your roof rack and tie-down equipment working like new.
Can You Leave a Kayak on a Roof Rack Long-Term?
Yes, you can — but only for a short time. Leaving your kayak tied to your roof rack for more than a few days is not a good idea unless it’s necessary.
Here’s why:
- Sun damage can weaken plastic and cause fading or warping
- Straps can loosen over time, especially in heat or rain
- Moisture can collect between the kayak and the roof, leading to mildew
- Strap pressure over several days can dent or deform soft kayaks
Best Practice:
- Remove the kayak when you get home, especially if you’re not paddling again soon
- Store it properly in a shaded or indoor area
- If you must leave it in the car, loosen the straps slightly to relieve pressure and cover the kayak
Taking Care of Your Tie-Down Gear
Your straps, hooks, and lines go through a lot — road dirt, sun, rain, and pulling stress. Ignoring them can lead to sudden breaks during travel.
Strap and Buckle Maintenance:
- Rinse with clean water after dusty or salty roads
- Let them dry completely before storing
- Check for fraying, cuts, or wear
- Avoid using straps that feel brittle or thin
- Store in a dry bag or container (not left in the car, where heat can weaken them)
Cleaning Tip:
Use mild soap and warm water to clean your cam buckle straps every few trips. Avoid harsh chemicals — they can damage the nylon.
Protecting Your Kayak Between Trips
Your kayak also needs care after each outing, especially if it was strapped tightly for a long drive.
What to Do:
- Wash off mud, saltwater, sand, or bugs with a hose
- Dry it fully before storage (inside and out)
- Check for cracks or pressure dents
- Store it on padded racks or foam blocks to keep its shape
Avoid leaving your kayak on hard surfaces for long periods. Even light pressure can warp plastic if left too long.
Roof Rack Maintenance Matters Too
Your roof rack holds everything together. A loose, rusted, or poorly aligned rack can ruin even a perfect tie-down job.
Maintenance Tips:
- Inspect crossbars and mounts every month
- Make sure bolts are tight and nothing is wobbling
- Look for signs of rust or cracks in the plastic or metal
- Clean off road grime after each trip
If your rack uses pads, check the foam — replace if it’s torn or squashed flat.
Weather Protection for Long Trips or Storage
If you’re driving long distances or storing your kayak on the roof for more than a few hours, consider using a kayak cover.
Benefits:
- Protects from UV rays
- Keeps bugs, tree sap, and road grime off the kayak
- Reduces fading and cracking
Choose a cover that fits snugly and has tie-down loops so it doesn’t flap during travel.
Gear Replacement Timeline (Helpful for Planning)
| Item | When to Replace |
|---|---|
| Cam buckle straps | Every 1–2 years or if worn |
| Bow/stern ropes | If frayed or weak |
| Foam blocks or pads | If crushed or torn |
| Roof rack components | Check yearly for wear |
| Kayak cover | If faded, ripped, or loose |
Taking care of your gear might seem like extra work, but it saves you from bigger problems — like a kayak falling off on the highway or your car’s roof getting scratched up.
Where to Store Everything
When you’re not using your tie-down gear or kayak, keep it clean and stored properly:
- Straps → Coiled and stored in a dry bag
- Bow/stern lines → In a labeled gear box
- Foam pads or blocks → On a garage shelf
- Kayak → On wall mounts or standing on its side (with padding)
Bonus Tip: Label your gear so it’s faster to pack next time — “front strap”, “rear strap”, etc.
Quick Recap: Kayak Transport Gear Maintenance
- Don’t leave your kayak on the roof for days at a time
- Clean your gear and kayak after every trip
- Check for wear, damage, and pressure dents
- Replace worn straps or broken parts before the next trip
- Store everything in a cool, dry place
Real-World Mistakes, Tips, and Advice from Kayak Owners
Even if you’ve learned how to tie a kayak to a roof rack the right way, it helps to hear from people who’ve done it over and over — and learned a few lessons the hard way. That’s why this section brings in real advice from everyday kayakers.
We’ll walk through common mistakes, practical tips, and smart habits that can save you time, money, and stress when loading or transporting your kayak.
Common Mistakes People Make (And How to Avoid Them)
These are the small things that often go wrong — but they’re easy to prevent once you know what to watch for.
1. Overtightening the Straps
Many new paddlers think tighter is better. But cranking down too hard can dent or warp your kayak, especially if it’s plastic.
💡 Real Tip: Tighten until the kayak is firm, but don’t force it. You should be able to wiggle the kayak slightly without it moving out of place.
2. Skipping the Bow and Stern Lines
Some people only strap down the middle of the kayak and hit the road. Without bow and stern lines, a strong wind or quick stop can shift the kayak or even snap the main straps.
💡 Real Tip: “I didn’t use bow lines once on a windy day and nearly lost my kayak on the highway,” — Mark, weekend paddler
3. Not Checking the Straps Mid-Trip
Even well-tied straps can loosen after 20–30 minutes of driving, especially on rough roads or in changing temperatures.
💡 Real Tip: Pull over after 15–20 minutes. Check the straps. It only takes a minute and can prevent bigger problems.
4. Using the Wrong Type of Strap
Bungee cords, ropes, or ratchet straps are common go-to items — but they’re not meant for kayak transport. They either stretch too much or apply too much pressure.
💡 Real Tip: “Cam straps are the only way to go. Ratchet straps crushed my old sit-in kayak.” — Lena, solo kayaker
5. Forgetting About Overhang Rules
If your kayak sticks out from the back of your vehicle more than 3–4 feet, you need to add a red flag (and sometimes a light). Forgetting this can get you pulled over or fined.
💡 Real Tip: Keep a cheap red bandana and bungee in your glove box just for this. Easy and legal.
What Experienced Paddlers Do Differently
Once you’ve tied and hauled a kayak a few times, you’ll start to develop your own routine. But here’s what veteran paddlers say helps most:
Label Your Straps
- Use tape or a marker to label straps as “Front” and “Back”
- Speeds up loading, especially if you’re doing it solo
Mark Your Roof Rack
- Add a piece of colored tape where your kayak should sit
- Helps you place the kayak evenly without needing to eyeball it
Keep a Transport Kit in the Trunk
Pack a small bag with:
- Two spare straps
- A red safety flag
- Gloves (for cold-weather loading)
- Foam blocks or towels
- Backup bow/stern ropes
Use Windows for Strap Check
When driving, some paddlers angle their side mirrors up slightly to see if the kayak shifts. You can also open the sunroof (if you have one) to do a quick strap visual check.
Personal Advice That Makes Things Easier
- Get a load assist bar if you paddle solo often. It’s a back-saver.
- Keep a step stool in your trunk for taller cars.
- Twist the straps once to stop that annoying humming sound on the highway.
- Avoid windy days for long-distance transport if possible.
Real Habits That Make Kayak Transport Simple
| Good Habit | Why It Helps |
|---|---|
| Rechecking straps every stop | Keeps everything safe and tight |
| Storing gear in a dry bag | Keeps things organized and clean |
| Washing off dirt after transport | Prevents damage to kayak and straps |
| Practicing loading at home | Reduces stress before real trips |
| Replacing straps yearly | Prevents damage to the kayak and straps |
Summary: Learn from Real Use, Not Just Instructions
While learning how to tie a kayak to a roof rack is about following steps, staying safe on the road often comes down to small habits and real experience. The more you practice, the easier it gets — but these tips from other paddlers can give you a big head start.
Top Questions About Tying a Kayak to a Roof Rack (Answered Clearly)
These are the most common questions real paddlers ask — and exactly what you need to know before hitting the road with a kayak on top of your car.
1. Can I transport a kayak without a roof rack?
Yes, but it’s only recommended for short local trips. You can place foam blocks or a kayak pad directly on the roof of your vehicle and run cam buckle straps through the doors. Always use bow and stern lines, too. This method works in a pinch but isn’t secure enough for long drives or highway speeds.
2. How tight should I make the straps?
Straps should be firm and snug, but not so tight that they dent or bend your kayak. Think of it like securing a suitcase — tight enough to stop shifting, but not crushing anything. If you hear creaking or see pressure marks, loosen them a bit.
3. Do I really need to use bow and stern tie-downs?
Yes. These tie-downs stop your kayak from shifting forward or backward when you brake, turn, or face the wind. They also add a backup layer of security in case your roof rack or main straps fail. Many states legally require these tie-downs — so it’s not optional.
4. How often should I check my straps during the drive?
Check them 15–30 minutes into your trip, and again at every gas or rest stop. Heat, vibration, and road bumps can loosen straps. A one-minute stop can save your kayak — and your trip.
5. Is it safe to drive on the highway with a kayak on my roof?
Yes — if it’s tied down correctly. Use cam straps, tie down the bow and stern, and keep your kayak centered on the rack. Also, add a red flag if the kayak extends more than 3 feet behind your vehicle. Drive a bit slower, especially in the wind or rain.
Helpful Resources From Trusted Sites
These external links provide extra value and verification from reputable, non-commercial sources:
- U.S. DOT Load Securement Rules
Check legal requirements for tying down large items like kayaks when traveling on public roads. - Paddling.com: Transporting Your Kayak Without a Roof Rack
Final Takeaways: Master Roof Rack Kayak Transport with Confidence
Tying a kayak to a roof rack doesn’t have to be complicated — and once you learn the steps, it becomes second nature. Whether you’re heading out for a solo paddle or a long weekend trip, the key is to load your gear safely, drive smart, and protect it.
What You Should Do Next
- Pick the right gear
Roof rack ✔ Cam straps ✔ Bow/stern lines ✔ - Practice loading your kayak at home
It makes trip days way easier. - Create a simple loading routine
Stick to the same process every time. - Check your setup before and during the drive
Especially on longer trips. - Keep your gear clean and stored properly
So it’s ready whenever adventure calls.
Let’s Stay Connected
At Kayak Rumors, we focus on real advice — not fluff. If this guide helped you, here’s how you can keep getting value:
👉 Subscribe to our newsletter for kayak tips, gear breakdowns, and how-to tutorials
👉 Bookmark this page to revisit before your next trip
👉 Share this guide with your paddle buddies — especially the ones who still tie their kayaks with bungee cords
Your time on the water should be stress-free. Make the journey just as smooth.